Saturday, September 24, 2011

Painted Chevron Sign

Subtitle: My first Silhouette {cutting machine} project!!!

After my amazing hunk of a hubby bought me a Silhouette cutting machine for my birthday, I was so excited I could pee my pants.  In fact, I think I may have done just that.  Just a little.  Don't judge.  I could not wait to jump right in and get started cutting some vinyl!  That enthusiasm, of course, led to the poor Silhouette sitting lonely on my craft shelf for almost 3 months.

However!  Here we are...with my first Silhouette project completed and hanging on the wall!  

This vintage chevron sign tutorial here at The Handmade Home was my inspiration for this first project.  The Handmade Home is my total blog crush.  Ashley's home is incredibly creative, handmade, artistic, and personal.  I often dream at night of packing up the kids, knocking on her door, and asking if we can move in.  

That weird stalkiness aside, on to the sign...

I decided to use this sign to display a list of the read aloud books that my son, Merrick, and I have read together.  Merrick is 5 years old and we just started homeschooling (kindergarten) a few weeks ago.  I will cherish the memories of reading these books together, snuggled up together on his bed, for a long, long time.

I made my sign just like Ashley's tutorial with a few exceptions.  The size of my sign is a little different, so I had to change up the dimensions a bit.  For the white paint, I used my leftover paint from my cubby storage project (which is still incomplete by the way...I think I'll be in diapers before that stinkin' project is finished!).  The white, Magnolia Blossom, is my new favorite white.


It took me at least one episode of Friday Night Lights to get through just taping the sign.   It took me a couple of tries before I figured out exactly where the tape should go.  I'm kinda brilliant like that.


These are the two greens I used.  I really like how one is a warm yellow green and the other is very cool.  As always, I used the Behr paint from Home Depot.  I love that it has the primer included in the paint.  


I tried wiping a bit of the paint off as mentioned in the original tutorial but didn't have much luck with that.  Instead, I used a dry brush and painted a little of the coordinating color here and there to give it a messy look.


Now that I'm looking at it again, I wish I would have painted a little green (using the same dry brush method) on the white as well.


Using the Silhouette was pretty simple once I figured it out (which, as I mentioned above, only took 3 months...once again, brilliant).  The only difficult thing was sticking the getting the letters to stay on straight.  I think, however, that there is a transfer paper that you can buy that can solve this problem.  Feel free to clue me in if you're in the know here.  


I couldn't wait to show my hubby how my first Silhouette project turned out.  He looked at it, as he always does, for a few seconds trying to figure out what to say.  "Sooooo....this is what it does, huh?" he said.  "Yes!  It just cuts all my letters and I slap it down on the board.   Do you like it?" I asked, naturally trying to trap him into giving me a definite answer.  "Yeah," he says, unconvincingly, "but, why wouldn't you just buy vinyl letters?"  Oh my gosh.  I am speechless for one full minute.  Did we just spend a couple hundred dollars on a confusing machine when I could have just spend $3.99 at Hobby Lobby on a few packs of vinyl letters?  Then, thinking quickly, I replied, "Because with this, I can make the letters any size and in any font."  Yes, I reassure myself, that is definitely worth a couple hundred bucks.  

OK.  I am still in love with my Silhouette.  I am probably going to make about 10 more signs in the next month alone.  But, I have got to figure out how to use it to it's full capacity so that the vinyl letter aisle at Hobby Lobby isn't mocking me every time I pass by.  If you have any resources to this effect, feel free to drop me a line.  :)


Thursday, September 8, 2011

Chocolate Chip Banana Cake


My two year old boy is a banana addict.  It's an addiction I am willing to support because every once in a while, we end up with a few extra bananas.  In the past, when those bananas got too ripe to eat, I'd bake them into some banana bread and give it to the family for breakfast (or, worse, I'd throw them into the freezer to make banana bread later and end up with twenty or thirty black frozen bananas).  

But, come on.  Let's be real.  If you're going to bake a couple of bananas into a "bread" that has sugar, flour, eggs, butter, and nuts...then, you smoother it with more butter when it comes out...you might as well take the next step and add a few chocolate chips and call it what it really is: awesome.

Don't get me wrong.  This recipe is not banana bread with chocolate chips.  Instead, it is more like the perfect cross between a chocolate chip cookie and banana cake.  

Mucho thanks goes to my best friend Angela for this recipe.  And, a big "no thank you" to that same awesome bestie for my new addiction.

Let me just say...


Now, I'll get to the actual recipe...


Chocolate Chip Banana Cake

2 cups flour
2 tsp. baking powder
1/2 tsp salt
3/4 cup butter or margarine
2/3 cup sugar
2/3 cup brown sugar
1 tsp vanilla extract
3 medium sized bananas, mashed
1 large egg
12 - 16 oz chocolate chips

Preheat the oven to 350. Grease a jelly roll pan (I use a 13 x 9 inch glass pan).
Combine the flour, baking powder, and salt.
Beat the butter, sugar, brown sugar, and vanilla until creamy. Beat in bananas and egg. Gradually beat in flour mixture. Stir in chocolate chips.
Spread into your pan.
Bake for 20-30 min.


{Enjoy!}


I'm linking up here:

Join  us Saturdays at tatertotsandjello.com for the weekend wrap 
 up           party!

Friday, August 26, 2011

Pallet Storage Crate {DIY}


After seeing countless numbers of reclaimed pallet projects, I had to jump on the bandwagon.  

My biggest need around here is storage for books.  Somehow, between myself and the three gremlins, we have managed to accumulate more books than the local library.  And, on top of that, we have a stack or two of books from the local library.  A few weeks ago, I made a couple of forward facing shelves.  But, those don't actually offer much storage, so I needed the pallet storage crate.

I got the idea, of course, from Ana White.  The plans for the project can be found here.

The plan seemed simple enough.
    1. Stalk local business until you find just the perfect pallet.
    2. Tear it apart.  Somehow.
    3. Recover for 3 weeks because tearing apart the pallet was so frustrating.
    4. Build the box.
    5. Get distracted for another week on projects like the Cubby Storage System and the Wooden Read Sign.
    6. Get it together and actually finish the project.


Ana left her pallet crates unfinished and they look wonderful.  But, I have been working a light olive/turquoise/splash of magenta color scheme in our playroom/schoolroom, so I decided to use paint left over from the chairs I made a few weeks prior.


This was probably not my favorite project, simply because the crate was SO well nailed together that it was difficult to tear apart (even with the help of this awesome video here).  But, watching my kids dive into the crate and read book after book...awesome.  


I went back and forth on this, but finally decided to add the coaster wheels to the bottom.  And, yes, if you're wondering, it took literally less than a minute for the kids to use it as a bumper car.  It took less than a day before my big kid tried to stuff my little kids into the crate.  He wouldn't confess to this, but I'm pretty sure his plan was to send them down the stairs.  Thankfully, they don't fit inside.


The one part of the crate I really like is the roughness and natural grain of the wood showing through (I'm not sure what you call this - unmilled?).  It was very hard for me to decide whether or not to paint this.  I finally decided to go for it, and I really like how it turned out.  


I really like how it turned out.  The best part?  It only cost the price of the wheels!


Join  us Saturdays at tatertotsandjello.com for the weekend wrap 
 up           party!

Friday, August 5, 2011

DIY: Wooden "Read" Sign


I love to read!  More than any thing, I want to pass on that obsession passion to my three crazy gorgeous kiddos.  To inspire them to put down the iPhone and break out the ol' paperback (at least until they each get iReaders), I have spent part of my summer creating a reading nook in our play/school room.

In total, I think I spent about $3.50 making this project.  The other materials, I already had on hand.  Here are the materials needed:
  • 2 x 4 board (first number refers to the depth of the board, second number refers to the width).  A 1 x 4 or 2 x 6 would work just as well.  I bought a 2 x 4 x 6 (last number being the length - 6 feet) for roughly $3.50.
  • Acrylic or craft paint and paintbrush
  • miter saw (or have your local hardware store cut it for you for free)
  • Wood glue
  • Pencil, 2 - 2.5 inch screws, drill, sawtooth hangers, wall anchors
  • optional: clamp, square, wood filler, wall (just kidding, the wall is probably pretty essential if you want to hang it)
Step 1.  Cut the 2 x 4 into various sizes.  

My boards range from 10.5 inches to 14.5 inches roughly.  I used a mitre saw (could not live without my mitre saw!) to make straight cuts, but you could easily get someone at your local hardware store to make these cuts for you.

Step 2.  Paint the boards various colors.    

This is a great naptime activity to do with your non-napping kiddos.  The more they mess it up, the more "character" it has.  That what I kept telling myself, any way.  

Tip: After painting the board the base color, use a "dry" brush to paint on a complimentary color.


Optional: An optional step is to sand the edges at this point to age the wood.  I didn't do that.  I felt like the different color paint on each board was enough.  Plus, I'm flat lazy.


Step 3:  While the paint is drying, design the letters.  I suggest using a different font for each letter to make it more interesting.  I used GIMP (a freeware similar to Photoshop) to design my letters.


Step 4:  Once the paint is dry, use a pencil to draw the letters onto each board.  


Step 5: Paint the letters.  

Be sure to use accent colors on each letter.  Add little design elements here and there for some eye candy.  


Step 6:  Break out the wood glue.  


Glue those bad boys together.  Don't be stingy with that glue.


If you have a clamp, now would be the time to use it.  If not, you can improvise using heavy objects to reinforce them together.  Although the glue bottle probable only says it takes 30 minutes to dry, I suggest leaving it overnight.


Be careful taking it out of the clamp.  Those boards are heavy and they may not stay together completely with glue alone.


Step 7:  Reinforce the boards with claw-backy-thingies (see below) OR screws. 


I never, ever have luck with the claw-backy-thingies (and I never turn down the opportunity to use a power tool), so I chose to use 2 inch screws.


Drill a screw at an angle into every joining board.  Don't forget to pre-drill!


It should look like this:


Optional:  Feel free to use some wood filler (not putty!) here to cover up the screws.  I did not.  Again...lazy.

Step 8:  Hammer the sawtooth hanger on the back.  

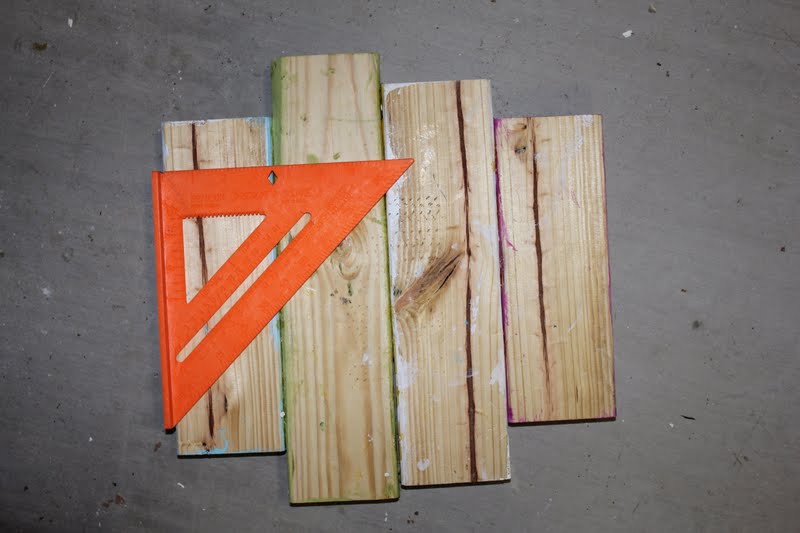
Tip:  Use a square to draw a straight line on the back.


I used this hanger:


Probably the trickest part of this entire craft is holding down those tiny, itsy-bitsy little nails that go into the hanger.  Evil little things.


Voila!  Hang it above your book shelves using a wall anchor. (unless you are able to nail it into a stud).  


Feel free to email me if you have any questions!  If you make a similar sign, I'd love to see it!  

Saturday, July 30, 2011

DIY: Spa Wrap Tutorial


Recently, a good friend turned a year older and I wanted to make her a gift that showed her how crazy cool I think she is.  Since her home away from home is the YMCA, I thought I'd make her a little spa wrap towel to use after her workouts.  Personally, my favorite thing about the gym is putting the kids in childcare, then taking a shower and putting on my make up in peace.  This little wrap lets you soak up those baby free moments in style.


Here we go...

Supplies Needed:


1. 2 towels - make sure the towel is large enough to wrap around you comfortably
2. Fabric - 2 times the length of your towel
3. Velcro - 3/4 inch sew in 
4. Elastic - 1.5 inch knit woven 
5. Scissors
6. Thread - should match your towel and fabric
7. Pins
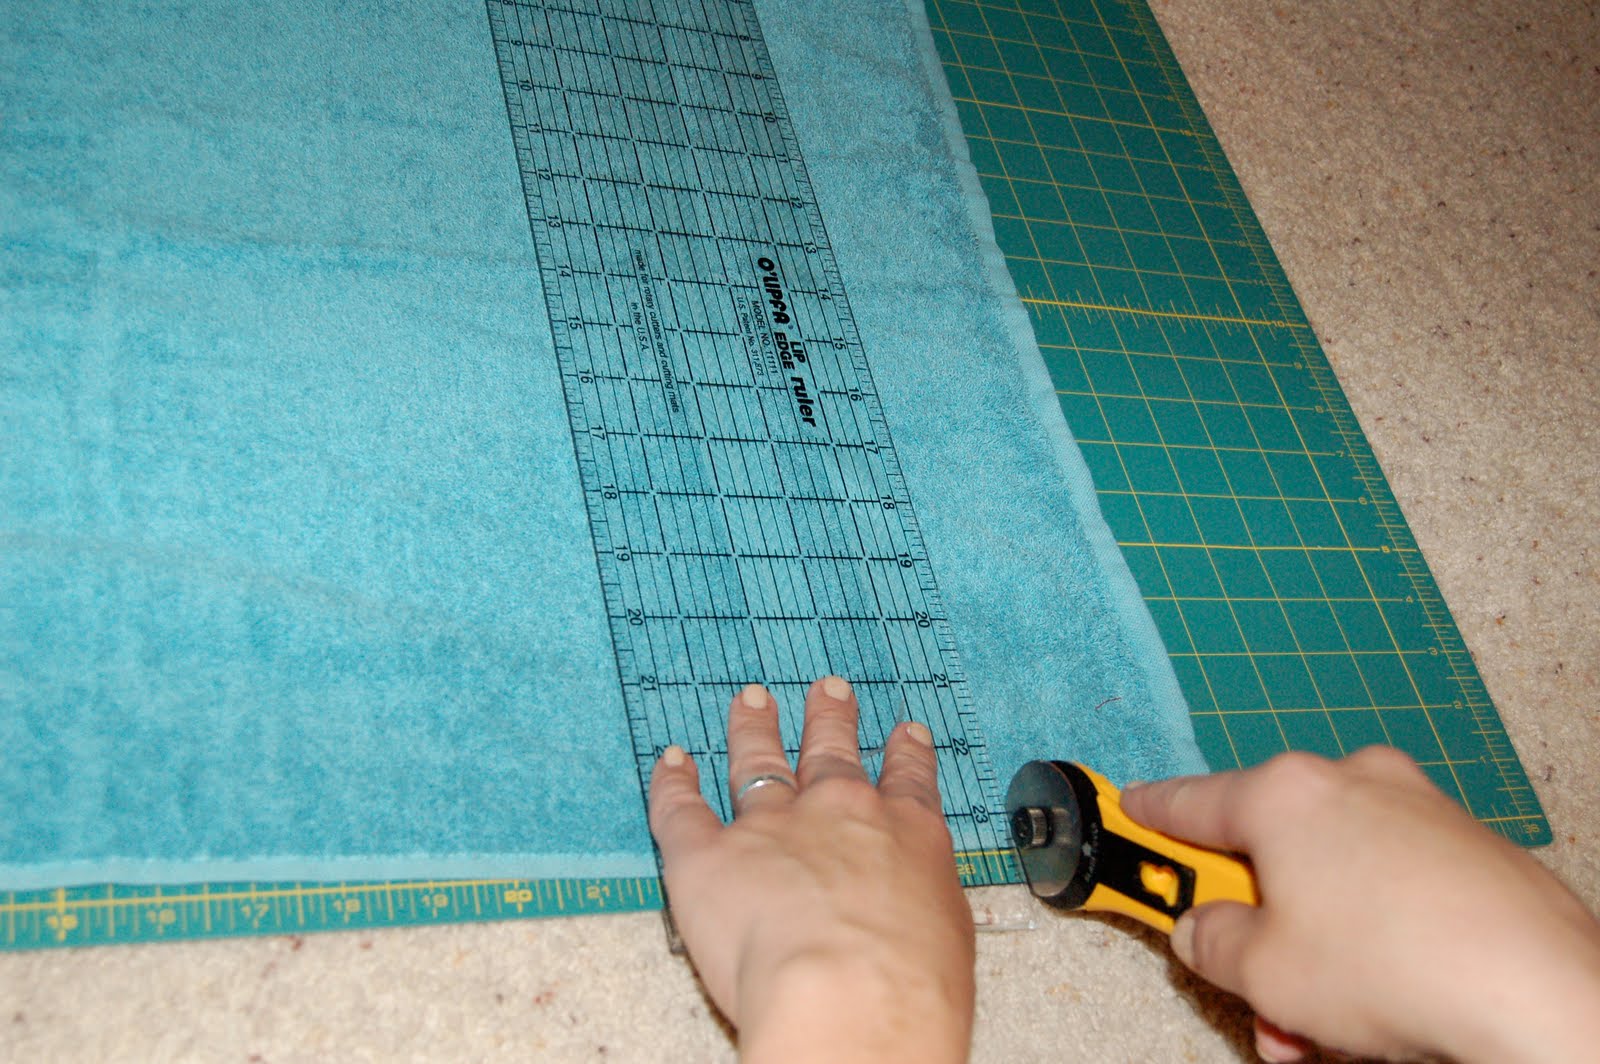
8. Cutting Board, ruler, rotary cutter, fabric pen (these are optional, I suppose, but make life a HECK of a lot easier!)

Ruffle:
1. Cut the edge off the towel and finish the edge.  You can do this with a zig zag stitch or with a serger.


2. Cut a strip of decorative fabric 5 inches wide by 2 times the length of the short side of your towel.  I had to cut two strips and sew them together in order to get the length needed.  Fold in half and press so that it measures 2.5 inches wide.  Finish the edges, again by zig zag or serger.  

3.  Gather the fabric to create the ruffle.  The way that I do this is by a) setting my sewing machine to the longest stitch length, b) loosening the tension of the top thread a bit, c) sewing one line with 1/4 inch seam, then d) pulling very gently on the top thread until the fabric gathers into a ruffle.
4. Adjust the length of the ruffle until it is the same size as the finished edge of the towel.  Pin the ruffle to the wrong side of the towel.  Sew.
*side note - I did try pinning the right sides of the fabric and towel together as well, but it didn't sit as well.


This next part is the tough part.  Hang in there...

Elastic:
1. Wrap the towel around your bodacious body.  This should give you a good idea of just how much fabric you'd like to "take in" with the elastic. 
2. Cut a strip of elastic about 10 - 12 inches.
3. With a pen, make little marks on the top of the elastic at the 1/4, 1/2, and 3/4 marks.  In other words, if you have a piece of elastic 12 inches long, there will be a mark at the 3, 6, and 9 inch marks (see photo below).  


4. Make a small mark on the middle of the top of the towel.  Then, make little marks 4 and 8 inches on either side of the middle.  These marks will help you line the elastic up to the appropriate places on the towel.
5. Using a zig zag stitch, sew the side of the elastic about 1/2 inch from the first mark (which should be about 8 inches from the middle).  Sew back and forth several times in order to secure it in place.
6.  Using the marks on the elastic and towel as guides, use a straight stitch to sew the top of the elastic in place.  Use a zig zag again to sew the other side in place.


7.  Using all the strength in your mighty biceps, fold the elastic over twice and sew along the bottom of the entire casing.  This will not be easy, but you can do it.  You may have to do this in portions to make sure that the sides match up correctly.


Velcro:
1.  Sew about 8 inches of velcro to the top sides of the wrap.  Be sure to fit the towel around you again to assure that you are sewing the velcro to the correct sides.  If the ruffle is wrapping to your left, the velcro should be sewn to the outside top of the left part of the towel and to the inside top of the ruffle side.  Confused yet?


Almost done...

Bottom Ruffle:
1. Cut 4 inch strips off the top and bottom of the extra towel.  I used the top and bottom so that the edges can keep that nice finishing.
2. Sew the two pieces together so that the length of the strips is twice as long as the spa wrap.  


3.  Finish the edges.


4. Gather the towel strip (just as you did to make the fabric ruffle).  This is not easy, so you may have to break it up into parts.  Take your time so that the thread doesn't break.
5. Sew the strip to the bottom of the towel - right sides together.  Press it down.  

If you like, take it to an embroidery store to have it monogramed.  


You're finished!  Now get to the gym and make all the girls in the locker room jealous!