Last year, I fretted over how to display all the loverly Christmas cards we receive from our beautiful friends. It's no secret, the more cards you display at Christmas time, the more people think you are super duper popular. Oh wait.
Anywho. Since I've gotten into woodworking (check out my attempts here and here and here), I have a lot of leftover mdf (medium density fiberboard) in my garage. Thankfully, I had one piece that was already just the right size for a Christmas card display thing-a-ma-jig.
Here's how you can make your own:
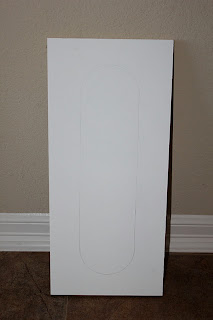
1. Get a piece of wood or mdf. I used 1/4 inch thick mdf. You can have the pros at your local hardware store cut yours to size.
2. Paint it white. Keep in mind, if you use mdf, it tends to take a lot more paint. You can use housepaint or acrylic paint (I used the cheap-o $.99 acrylic stuff from Hobby Lobby).
3. Draw the basic outline for your word box. To do this, I used my kids' plastic cereal bowl to make the curves at the ends, then my square to make sure the lines were straight.
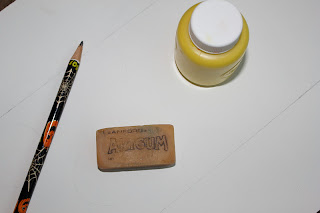
4. Lightly make the round circles inside the text box. I used the bottom of a paint container. After I got the circles where I wanted them, I erased them to the point where I could see them just enough to paint them. I do this because I like to paint the circles with a light coat of paint and don't want pencil marks showing through.
5. Paint the circles! Again, use a light coat of paint here. I found that it's best to use a flat tip paint brush to get the best circles.
6. Don't pay attention to this picture! Or, pay attention to it, but then skip it! I would wait until after you paint everything else to paint the black outline.
7. Draw in your zebra print. I simply googled "zebra print," then found a picture I liked and used that to inspire the drawing on my beautimous Christmas card display holder thingy.
8. Draw in the words. I used Nightmare Before Christmas font.
A couple of sidenotes: I actually like the cheapest red paint for this - Apple Barrel from Wal-mart.
I use a paper plate as my paint palette. I find that to be the most awesome paint palette ever.
Here is a close up of my preferred brushes. I use a foam brush for big over all paint (it works well for the circles too!). I like the flat brushes for detail work.
9. (Or step 6 again if you skipped it the first time like I told you to!) Paint in the zebra print. Then, paint the black outline. Paint in the words.
10. Paint those tiny little cute dots on the outline...'cause hey - design is in the details!
11. Sorry there is no picture for this, but now is the time to hang the picture hanger on the back!
12. Hot glue the adorable little clothes pins on the edges. Glue them so that about 1/2 inch is hanging off the edge. I used a ruler to make sure mine were evenly spaced apart. The clothes pins can be found at Walmart in the stationary section. They are 2 inches long and 1/4 inch thick.
13. Hang your Christmas Card Display Work-of-Art (bingo! I finally figured out a name for it!) then sit back and admire it.
14. Then, clip on a bunch of cards from the years past so that when folks come to your home, they think that you are incredibly popular and have a lot of friends.
Merry Christmas!


This is a great idea! You did a super job on yours.
ReplyDeleteWhat a fabulous idea Leslie! You are so crafty :) xo
ReplyDeleteI LOVE all your crafts! Hope over and visit pluffmuddstudio.blogspot.com
ReplyDeleteI would love for you to do a guest post if you are interested, send me an e-mail - pluffmuddstudio@gmail.com