Friday, August 26, 2011

Pallet Storage Crate {DIY}


After seeing countless numbers of reclaimed pallet projects, I had to jump on the bandwagon.  

My biggest need around here is storage for books.  Somehow, between myself and the three gremlins, we have managed to accumulate more books than the local library.  And, on top of that, we have a stack or two of books from the local library.  A few weeks ago, I made a couple of forward facing shelves.  But, those don't actually offer much storage, so I needed the pallet storage crate.

I got the idea, of course, from Ana White.  The plans for the project can be found here.

The plan seemed simple enough.
    1. Stalk local business until you find just the perfect pallet.
    2. Tear it apart.  Somehow.
    3. Recover for 3 weeks because tearing apart the pallet was so frustrating.
    4. Build the box.
    5. Get distracted for another week on projects like the Cubby Storage System and the Wooden Read Sign.
    6. Get it together and actually finish the project.


Ana left her pallet crates unfinished and they look wonderful.  But, I have been working a light olive/turquoise/splash of magenta color scheme in our playroom/schoolroom, so I decided to use paint left over from the chairs I made a few weeks prior.


This was probably not my favorite project, simply because the crate was SO well nailed together that it was difficult to tear apart (even with the help of this awesome video here).  But, watching my kids dive into the crate and read book after book...awesome.  


I went back and forth on this, but finally decided to add the coaster wheels to the bottom.  And, yes, if you're wondering, it took literally less than a minute for the kids to use it as a bumper car.  It took less than a day before my big kid tried to stuff my little kids into the crate.  He wouldn't confess to this, but I'm pretty sure his plan was to send them down the stairs.  Thankfully, they don't fit inside.


The one part of the crate I really like is the roughness and natural grain of the wood showing through (I'm not sure what you call this - unmilled?).  It was very hard for me to decide whether or not to paint this.  I finally decided to go for it, and I really like how it turned out.  


I really like how it turned out.  The best part?  It only cost the price of the wheels!


Join  us Saturdays at tatertotsandjello.com for the weekend wrap 
 up           party!

Friday, August 5, 2011

DIY: Wooden "Read" Sign


I love to read!  More than any thing, I want to pass on that obsession passion to my three crazy gorgeous kiddos.  To inspire them to put down the iPhone and break out the ol' paperback (at least until they each get iReaders), I have spent part of my summer creating a reading nook in our play/school room.

In total, I think I spent about $3.50 making this project.  The other materials, I already had on hand.  Here are the materials needed:
  • 2 x 4 board (first number refers to the depth of the board, second number refers to the width).  A 1 x 4 or 2 x 6 would work just as well.  I bought a 2 x 4 x 6 (last number being the length - 6 feet) for roughly $3.50.
  • Acrylic or craft paint and paintbrush
  • miter saw (or have your local hardware store cut it for you for free)
  • Wood glue
  • Pencil, 2 - 2.5 inch screws, drill, sawtooth hangers, wall anchors
  • optional: clamp, square, wood filler, wall (just kidding, the wall is probably pretty essential if you want to hang it)
Step 1.  Cut the 2 x 4 into various sizes.  

My boards range from 10.5 inches to 14.5 inches roughly.  I used a mitre saw (could not live without my mitre saw!) to make straight cuts, but you could easily get someone at your local hardware store to make these cuts for you.

Step 2.  Paint the boards various colors.    

This is a great naptime activity to do with your non-napping kiddos.  The more they mess it up, the more "character" it has.  That what I kept telling myself, any way.  

Tip: After painting the board the base color, use a "dry" brush to paint on a complimentary color.


Optional: An optional step is to sand the edges at this point to age the wood.  I didn't do that.  I felt like the different color paint on each board was enough.  Plus, I'm flat lazy.


Step 3:  While the paint is drying, design the letters.  I suggest using a different font for each letter to make it more interesting.  I used GIMP (a freeware similar to Photoshop) to design my letters.


Step 4:  Once the paint is dry, use a pencil to draw the letters onto each board.  


Step 5: Paint the letters.  

Be sure to use accent colors on each letter.  Add little design elements here and there for some eye candy.  


Step 6:  Break out the wood glue.  


Glue those bad boys together.  Don't be stingy with that glue.


If you have a clamp, now would be the time to use it.  If not, you can improvise using heavy objects to reinforce them together.  Although the glue bottle probable only says it takes 30 minutes to dry, I suggest leaving it overnight.


Be careful taking it out of the clamp.  Those boards are heavy and they may not stay together completely with glue alone.


Step 7:  Reinforce the boards with claw-backy-thingies (see below) OR screws. 


I never, ever have luck with the claw-backy-thingies (and I never turn down the opportunity to use a power tool), so I chose to use 2 inch screws.


Drill a screw at an angle into every joining board.  Don't forget to pre-drill!


It should look like this:


Optional:  Feel free to use some wood filler (not putty!) here to cover up the screws.  I did not.  Again...lazy.

Step 8:  Hammer the sawtooth hanger on the back.  

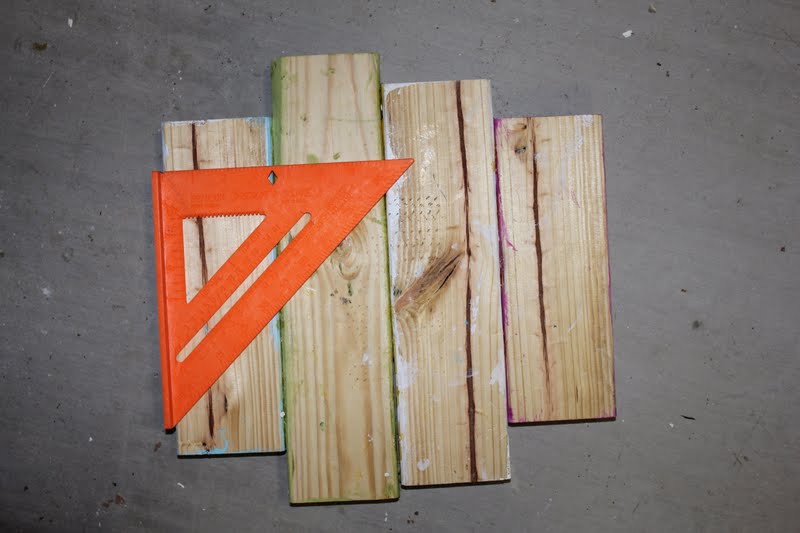
Tip:  Use a square to draw a straight line on the back.


I used this hanger:


Probably the trickest part of this entire craft is holding down those tiny, itsy-bitsy little nails that go into the hanger.  Evil little things.


Voila!  Hang it above your book shelves using a wall anchor. (unless you are able to nail it into a stud).  


Feel free to email me if you have any questions!  If you make a similar sign, I'd love to see it!  

Saturday, July 30, 2011

DIY: Spa Wrap Tutorial


Recently, a good friend turned a year older and I wanted to make her a gift that showed her how crazy cool I think she is.  Since her home away from home is the YMCA, I thought I'd make her a little spa wrap towel to use after her workouts.  Personally, my favorite thing about the gym is putting the kids in childcare, then taking a shower and putting on my make up in peace.  This little wrap lets you soak up those baby free moments in style.


Here we go...

Supplies Needed:


1. 2 towels - make sure the towel is large enough to wrap around you comfortably
2. Fabric - 2 times the length of your towel
3. Velcro - 3/4 inch sew in 
4. Elastic - 1.5 inch knit woven 
5. Scissors
6. Thread - should match your towel and fabric
7. Pins
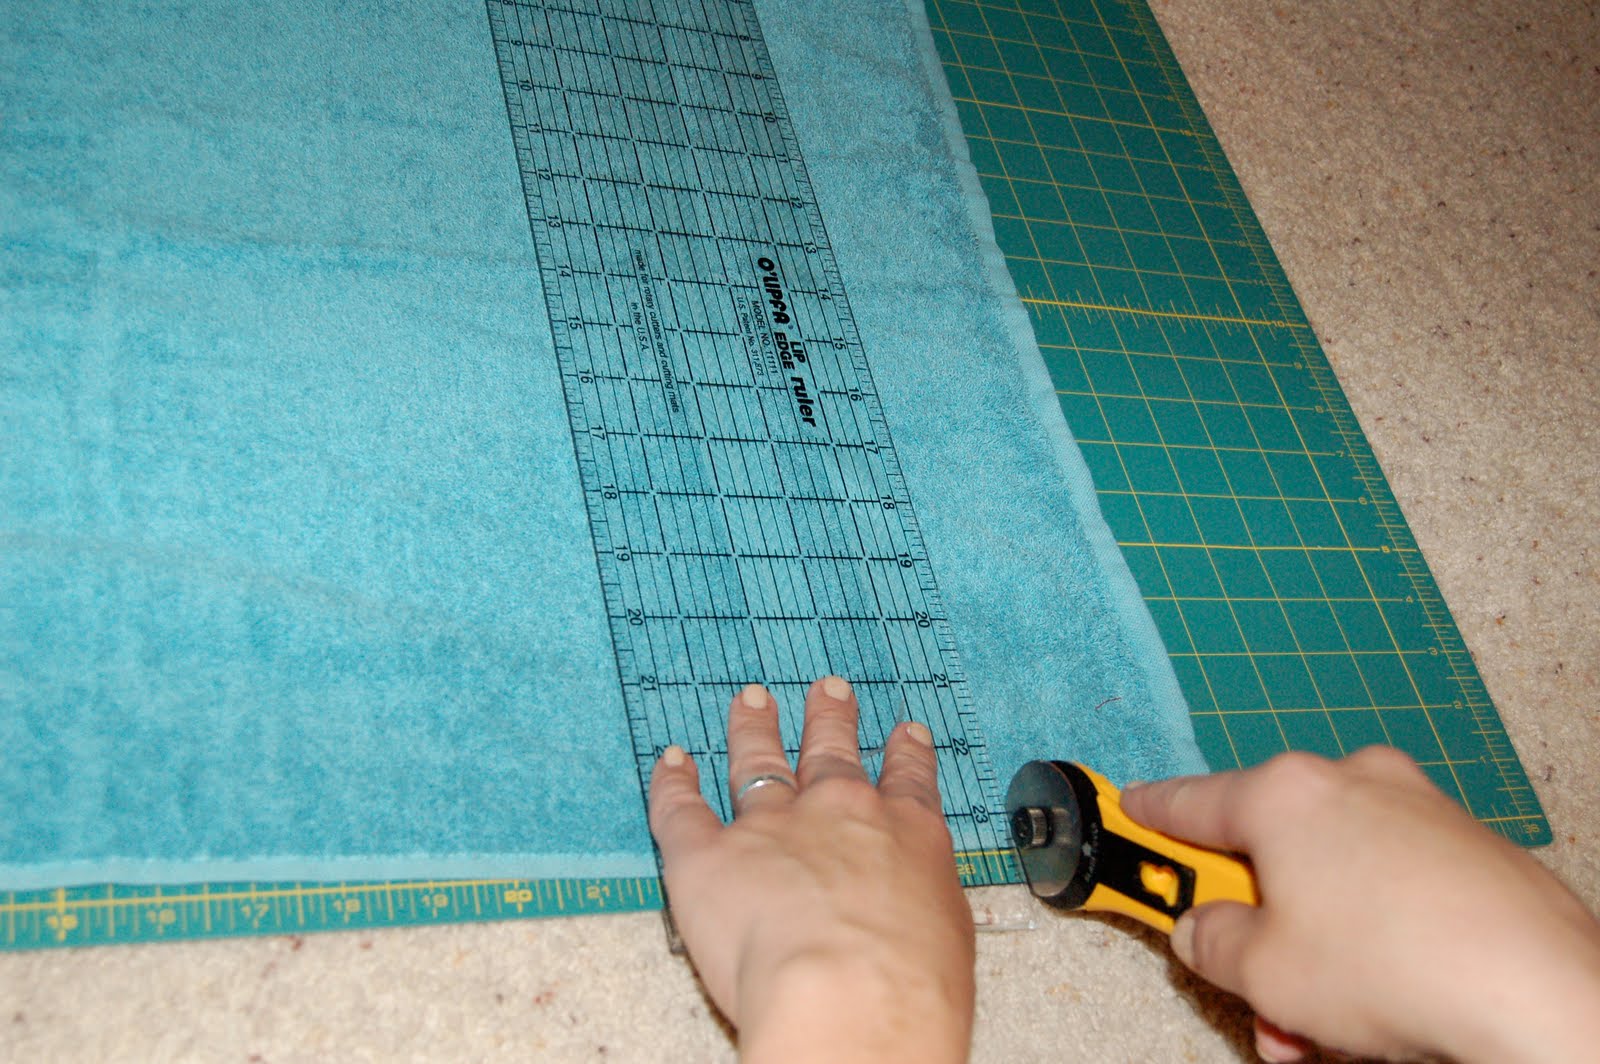
8. Cutting Board, ruler, rotary cutter, fabric pen (these are optional, I suppose, but make life a HECK of a lot easier!)

Ruffle:
1. Cut the edge off the towel and finish the edge.  You can do this with a zig zag stitch or with a serger.


2. Cut a strip of decorative fabric 5 inches wide by 2 times the length of the short side of your towel.  I had to cut two strips and sew them together in order to get the length needed.  Fold in half and press so that it measures 2.5 inches wide.  Finish the edges, again by zig zag or serger.  

3.  Gather the fabric to create the ruffle.  The way that I do this is by a) setting my sewing machine to the longest stitch length, b) loosening the tension of the top thread a bit, c) sewing one line with 1/4 inch seam, then d) pulling very gently on the top thread until the fabric gathers into a ruffle.
4. Adjust the length of the ruffle until it is the same size as the finished edge of the towel.  Pin the ruffle to the wrong side of the towel.  Sew.
*side note - I did try pinning the right sides of the fabric and towel together as well, but it didn't sit as well.


This next part is the tough part.  Hang in there...

Elastic:
1. Wrap the towel around your bodacious body.  This should give you a good idea of just how much fabric you'd like to "take in" with the elastic. 
2. Cut a strip of elastic about 10 - 12 inches.
3. With a pen, make little marks on the top of the elastic at the 1/4, 1/2, and 3/4 marks.  In other words, if you have a piece of elastic 12 inches long, there will be a mark at the 3, 6, and 9 inch marks (see photo below).  


4. Make a small mark on the middle of the top of the towel.  Then, make little marks 4 and 8 inches on either side of the middle.  These marks will help you line the elastic up to the appropriate places on the towel.
5. Using a zig zag stitch, sew the side of the elastic about 1/2 inch from the first mark (which should be about 8 inches from the middle).  Sew back and forth several times in order to secure it in place.
6.  Using the marks on the elastic and towel as guides, use a straight stitch to sew the top of the elastic in place.  Use a zig zag again to sew the other side in place.


7.  Using all the strength in your mighty biceps, fold the elastic over twice and sew along the bottom of the entire casing.  This will not be easy, but you can do it.  You may have to do this in portions to make sure that the sides match up correctly.


Velcro:
1.  Sew about 8 inches of velcro to the top sides of the wrap.  Be sure to fit the towel around you again to assure that you are sewing the velcro to the correct sides.  If the ruffle is wrapping to your left, the velcro should be sewn to the outside top of the left part of the towel and to the inside top of the ruffle side.  Confused yet?


Almost done...

Bottom Ruffle:
1. Cut 4 inch strips off the top and bottom of the extra towel.  I used the top and bottom so that the edges can keep that nice finishing.
2. Sew the two pieces together so that the length of the strips is twice as long as the spa wrap.  


3.  Finish the edges.


4. Gather the towel strip (just as you did to make the fabric ruffle).  This is not easy, so you may have to break it up into parts.  Take your time so that the thread doesn't break.
5. Sew the strip to the bottom of the towel - right sides together.  Press it down.  

If you like, take it to an embroidery store to have it monogramed.  


You're finished!  Now get to the gym and make all the girls in the locker room jealous! 

Thursday, July 21, 2011

Blue + Green = Color Scheme Dream

I love me some color.  I love how color can convey emotion and set the tone for a room.  It can make me feel passionate or peaceful.  I love the nature of contrasting colors.  I love how one color with a certain undertone can make a room feel completely warn while the same color with a different undertone can make the room feel the complete opposite.  

I love color.

So, here's how color is working in my homestead.  Though one of my favorite colors is red, I couldn't seem to pull that off in my last house without it feeling too country or traditional.  In our current home, which we bought when we realized we were having twins, I decided to change it up.  Now more than ever, with 3 kids under the age of 5, I need a peaceful home.  That's the main reason I chose blue and green for our main colors in our home.  

The other reason is that blue and green ROCK.  

OK, let's start in the living room.  Colors: slate blue and medium olive green.

Here's the current work-in-progress state of affairs.  I know.  It's looking pretty scarce without the rug and curtains.  We're working on that.  Each time we've sat down to buy those, my transmission goes out or a kid has to go to the hospital and rack up a huge bill.  I think its God's way of telling me NOT to put my hope in home decor, but in the Lord.  :)


Here's a close up of the chairs we recently bought.  I love the modern wingback/armless style chairs out these days.


Soon, we'll put these bad boys up...


And, this rug from Serena and Lily.  In the meantime, I might just paint a canvas rug this style as seen here.

Here are a few pics of my all time favorite DREAM living room:


Love.


Love.  Love.  

Love me some Nate Berkus living room as well.


Here's a pic of our kitchen.  I fell in love with this kitchen two years ago when we were looking for homes.  I loved the backsplash.   I wanted to get my stylist to come in and help arrange the kitchen for this photo (you know, but out some fresh flowers, have some food out like we're in the middle of a nice meal) but since it was such a last minute photo shoot AND since I don't even have a stylist, that didn't work out.  


As for the guest bedroom...it has been poorly neglected. Actually, it has been misused, even, as I change the twins' diapers and do laundry in there daily.  One day, however, I hope it will look something like this:


I love those turquoise walls with the bold red curtains.

Though, I would totally "settle" for this as well:


Gorgeous!!!

Now, for the master bedroom.  We have not done too much to the master since moving in.  There is so much to do in this house!  However, if I could snap my fingers and just wish myself into my dream bedroom, it might look something like....  


this gorgeous room:


I am crazy for ikat.  However, not at the $400 a yard pricetag.  Boo.  
(The original source of this pic has somehow been lost.)

As for my craft room, I couldn't possibly post a picture of that right now.  It is a wreck!  However, below is a somewhat recent pic to give you an idea of the color of the walls/furniture.  Blogged here.  Since we bought a new spec home, the entire home was already painted this lovely tan color.  It's a nice enough color, but I SO wish we had the time/money/energy to paint some of the walls.  Thankfully, my hubby allowed me this one concession in allowing me to paint my craft room walls grey.  


This was one of my many inspiration photos.  There is something about those dark grey walls that make the color just pop.  I painted one of the walls in my craft room a similar color.  I'll blog about one day...when it's all finished.  


(Unsure of the original source.  Shoot me an email if you know!)

Now, on to the kiddo rooms!

For the twins' room, I decided to go with a blue/green and pink/green color scheme.  

 Here's Scout's side of the room:


And Sawyer's side of the room:  
(For those detailed mamas amongst us, I no longer use the bumpers.  I just put them on there to give you an idea of the colors...)


Here's the space in between their cribs.  The curtain is Amy Butler fabric, but I'm so ready for something new.  The silhouettes were blogged here.  


For Merrick's room, I found inspiration for the navy/grass room (with small splashes of red) from Serena and Lily.  The pictures above his bed are photographs I took of letters around Austin, TX to spell out his name.  I made the curtains to match (sort of) his bedspread.


This is across from his bed.  Merrick and I made the painting together when he was four.  That's his handprint signature at the bottom right corner.  More on that later.  


Here is my current project: the homeschool room/playroom!  Everything in this pic (with the exception of the Serena and Lily stool) we've built in the past several weeks with plans from Ana White (looooove her!).  I'm about half way done with this room and hope to be finished by September.  


This was the inspiration (mostly) for the playroom/ homeschool room.  I'm hoping to make one of those adorable fushia/turquoise seats.  Unfortunately, I won't be painting the walls blue, but I'm working on a little wall art that will hopefully bring more color to the room.


And, speaking of color, I can't end this post without sharing one of my favorite inspiration photos.  In the future, when I (with a heavy heart) will have to split up the twins and give them each their own room (or have the boys share), I hope to give Scout a room similar to this one:


And that's the home I'm making!  It's a work in progress.  A very, very long work in progress.  But, I soooo enjoy the process.  :)

By the way, this post idea originated from Ashley at the Handmade Home.  I'm linking to her True Colors Par-tay: